How To Set Up Facebook Ads Custom Conversions
Have you needed to measure and track the performance of the specific pages on your website?
Welcome to the 21st century, where every penny spent on advertising on Facebook can be measured – at least for Facebook Ads and Google Ads (we will only tackle Facebook Ads in this blog post). Now this is a great thing to hear if you are a business owner taking advantage of the Facebook advertising platform. It can all be done with a piece of code.
So what are Custom Conversions?
Custom Conversions allow us to track and optimize actions on specific web pages. It is the simplest form of conversion tracking, requiring no modification of the Facebook pixel code on your website. This tracking method is contained within the Facebook Ads Manager and uses the URLs of the pages you want to track.
Here’s how to set it up.
Place Standard Event
First thing you need to do is to place the standard event on all thank-you pages you want to use to track a specific event:
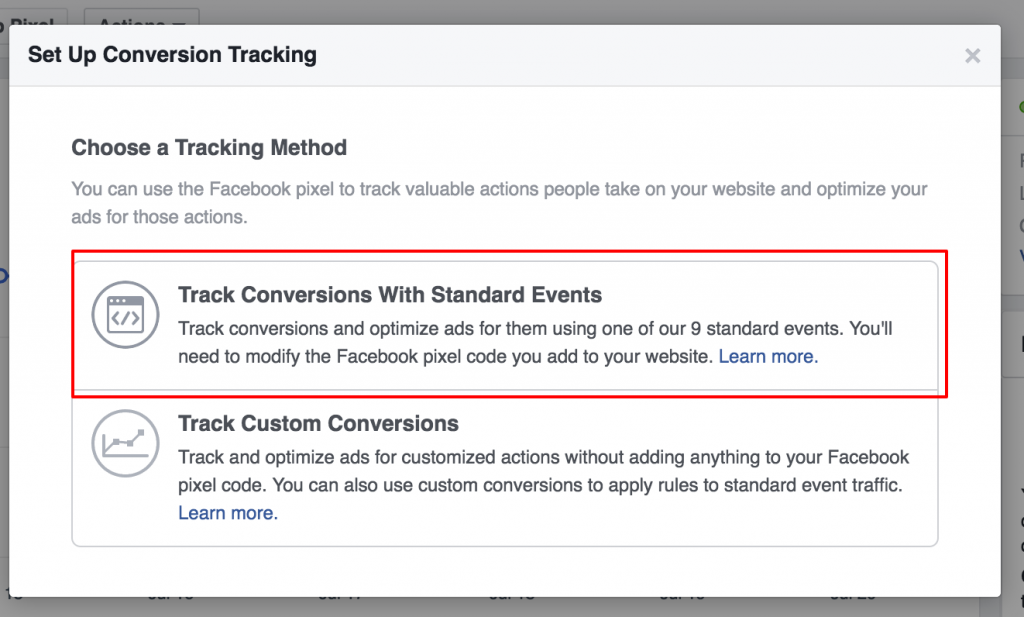
Here are the nine standard events:
- View Content
- Search
- AddToCart
- AddToWishlist
- InitiateCheckout
- AddPaymentInfo
- Purchase
- Lead
- CompleteRegistration
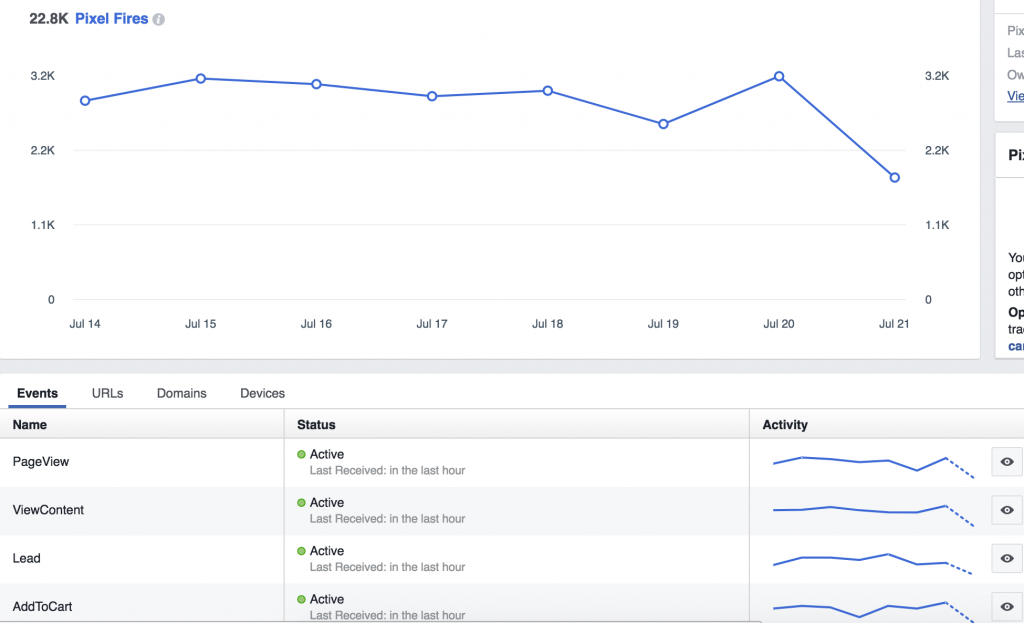
Once you have placed the event on the pages you want, you should see the event show up as active on your pixel page. You’ll see something like this…
Set Up Custom Conversions
To start, determine all specific thank-you page URLs for each brand and then start creating custom conversions.
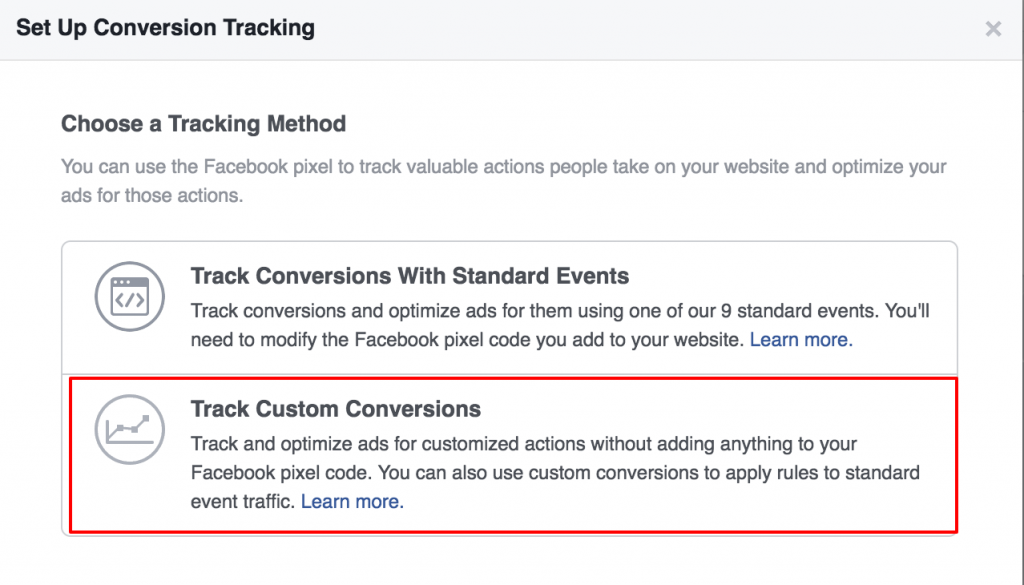
Think about the online goals (macro and micro) you want to track after people visit your site. Here are few of them:
- Submitting a request a quote form
- Scheduling an appointment
- Registering for a product demo
- Downloading an eBook
- Adding an item to a shopping cart
- Initiating a check out
- Completing a purchase
In the screenshot below, you can choose one rule option: URL Contains, URL Equals, or Event.
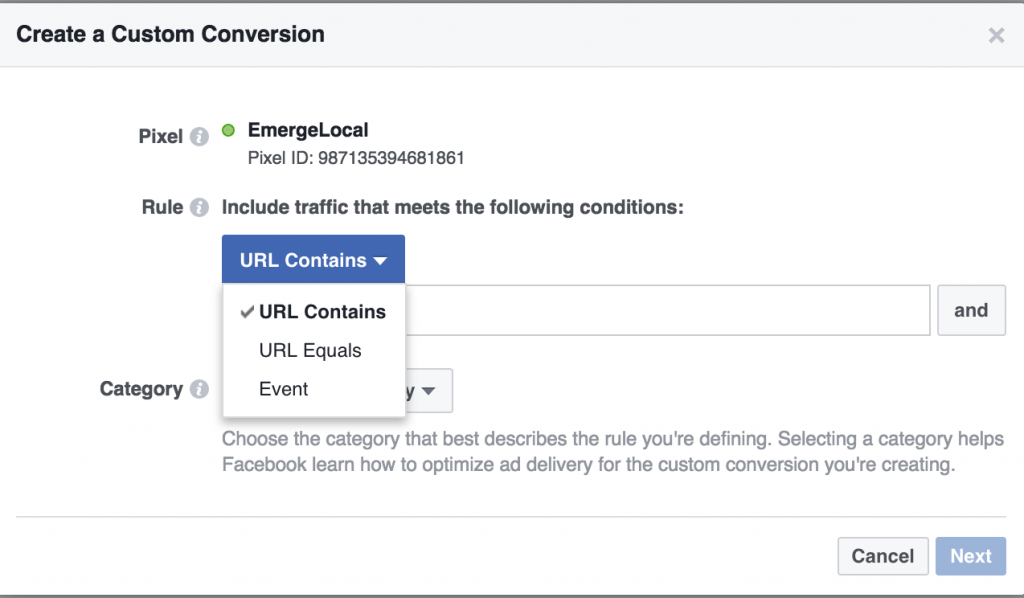
Let’s say the thank you page is www.emergelocal.com/thank-you, this is how you implement it:
URL Contains: thank-you, OR
URL Equals: www.emergelocal.com/thank-you
The Event option is applicable when you place the standard events. It needs technical skill. If you want to find out how, you can contact us.
Next, you choose a category. Choose the category based on the standard event that was placed earlier.
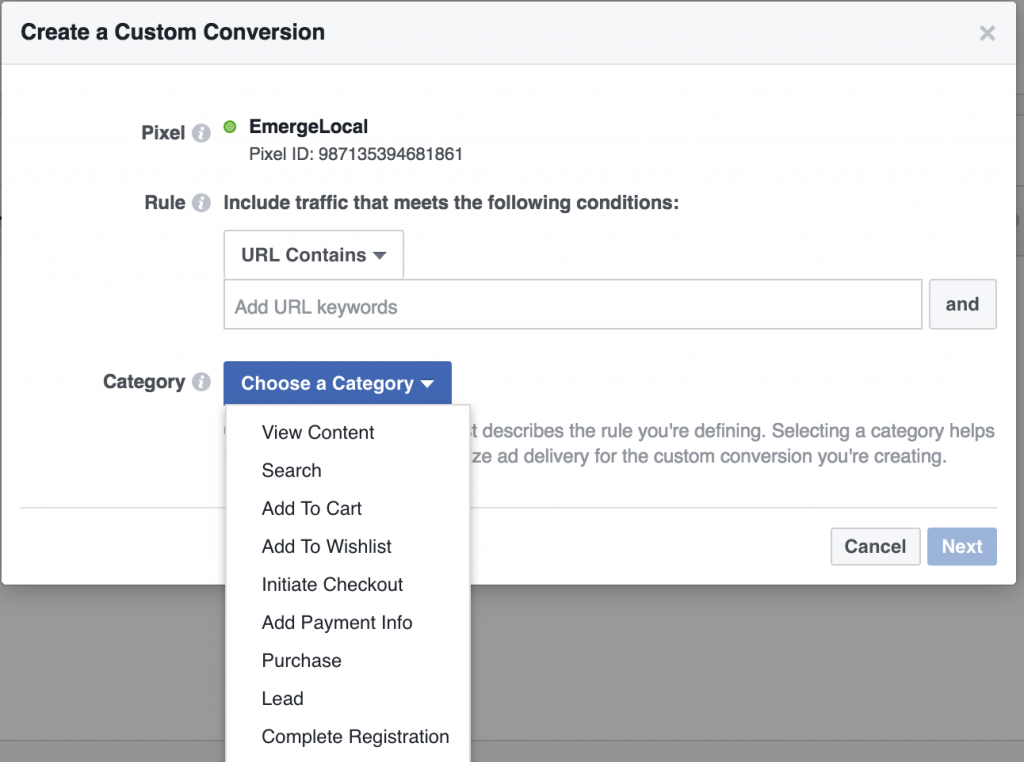
Once you’re done choosing a category name, hit “Next”.
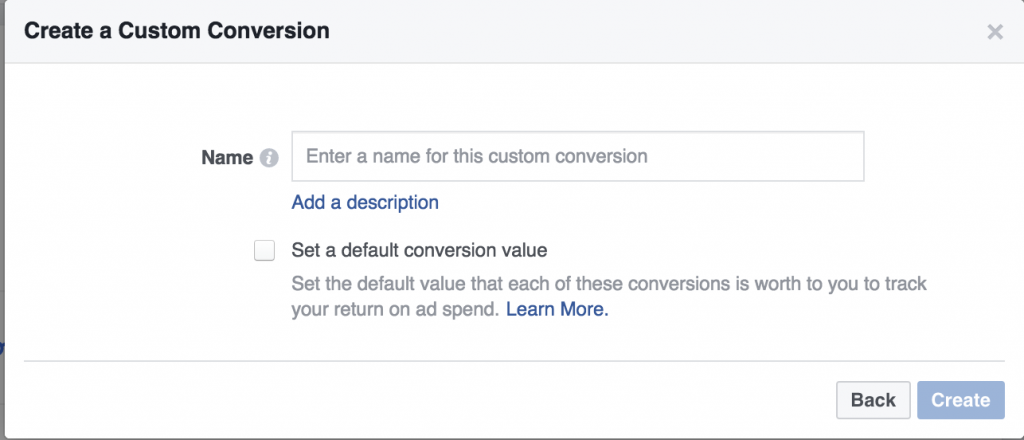
Protip: Name it based on the specific page you are tracking because this will be how you see the conversions in reporting. The conversion value is optional but I highly suggest to put a value – think of how much you are willing to pay for a lead or any online goal. That’s your conversion value.
Track Custom Conversions
This is the final step of the entire process.
In reporting columns, your conversion will show up under the name you labeled your custom conversion.

Conclusions
You can now start tracking!
If you’re looking to track and optimize your Facebook Ads according to your online goals — you’ve got to be using the Custom Conversions tracking in your campaigns.
What do you think? Have you installed Custom Conversions on your website? Please share your thoughts in the comments below.
